 InDesign’s Book feature can be handy! Let’s say you’re working on a book with lots of images and/or chapters. And the file sizes are enormous. In fact, they are so big that you thought it would be smart to divide the book into separate documents for parts or chapters. That’s exactly what we did with Book Design Made Simple. It was more convenient for us to swap smaller sections back and forth than to send the entire book each time. All the parts or chapters were linked together at the end using InDesign’s Book feature. So this blog post explains how to create a Book file, or as we call it, “book” a book.
Getting started with the Book feature
You’ll be gathering several InDesign documents into one Book file to create a book. If you’re just getting started on your chapters, it’s best to design one of your more complex chapters first, then use that chapter as a template for all the remaining ones (i.e., “Save As” Chapter 1, delete all the original chapter’s text, place the Chapter 1 text, and thereby leave the trim size, margins, and styles intact and consistent among all chapters).
If you’ve already created separate InDesign files for your chapters, you can combine them using the Book feature just fine as long as they all have the same trim size. Books look better when margins and styles are consistent throughout, but it’s not a requirement. The Book feature will allow you to synchronize styles throughout all your booked documents, but again, it’s not a requirement, and it doesn’t happen automatically.
Creating a Book file
Now that you have separate InDesign documents for each part or chapter in your book, you’ll combine all the documents using the Book feature. Here’s how:
- In InDesign, click File>New>Book to get the New Book dialog box. Navigate to a place to save your Book file (perhaps in the same folder as your chapters), type a title for your Book file in the File Name box, and click Save. (Note that your Book file has an .indb file extension.)

- Now you’ll see your new Book file within a panel with its file name at the top:
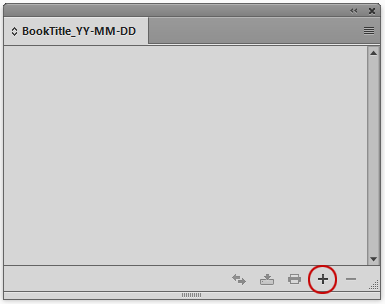
- Click the plus sign at the bottom of the panel to open the Add Documents dialog box. Navigate to your chapter documents and select them all at once (select the first one, press Shift, then select the last one), then click Open. Now the documents will all be shown in your Book file. Save the Book file by clicking the Save the Book icon at the bottom of the panel (second from the left). Here is what our Book Design Made Simple panel looks like:

You’ll see the page numbers for each document to the right. In the example above, the documents are not in the correct order, and the page numbering for Chapter 1 should begin with number 1. Your documents might not be in the correct order or be numbered properly. - To get the documents in your Book file in the right order, simply select a document and drag it up or down to the correct position. And setting up automatic page numbering is explained below. Remember to save your Book file (see Step 3 above) after you make any changes.
Opening documents within the Book file
Each time you work on a document in your Book file, it’s best to open your Book file first, then double-click the document to open it within the Book file. That way, the Book file remains up to date. If you work on a document outside of the Book file, the Book file will show an error symbol next to that document. If that happens, just double-click the document in the Book file to open it and re-save it to get rid of the error. And after you’ve saved your documents, remember to save your Book file too.
Adding the Book file panel to your docked panels
You’ll notice when you’re working on a document in InDesign that your Book file panel will remain in front of the document and it can get in the way. If so, drag the panel over to the dock at the right of your screen to dock it with the other panels.
Using the Book feature
Once your Book file is set up, it’ll dynamically link all the documents in your Book file to easily perform a number of functions. We’ll explain the most useful functions:
- synchronizing page numbers
- synchronizing styles
- generating automatic tables of contents
- packaging the book for print
- creating a single PDF of the whole book
Synchronizing page numbers
There are two ways to number the pages using the Book feature: manually or automatically. If you’ve set the starting page number in each document manually, those page numbers will appear in your Book file. There are, however, advantages to numbering your pages automatically. For example, say you decide to add a few pages to a chapter, or change your mind about the order of the chapters. With automatic page numbering, your Book file will adjust the page numbers accordingly whenever you make changes that affect the page numbering.
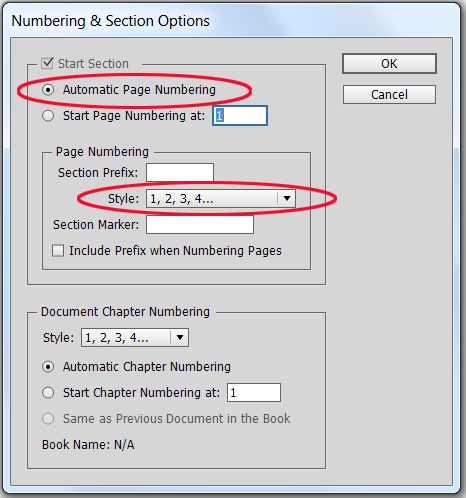
Page numbering is set within each document (see Book Design Made Simple, page 245). To set your page numbering to automatic, start by opening the document containing your front matter. Your front matter will have a separate page numbering system from the rest of your book, using lowercase roman numerals. Go to the Pages panel, click on the thumbnail image of the first page to highlight it, then click Numbering & Section Options in the Pages fly-out menu. Select Automatic Page Numbering at the top, and lowercase roman numerals in the Page Numbering Style drop-down menu, as shown below. Click OK, and all the pages in the document will now be numbered with lowercase roman numerals starting with number i.

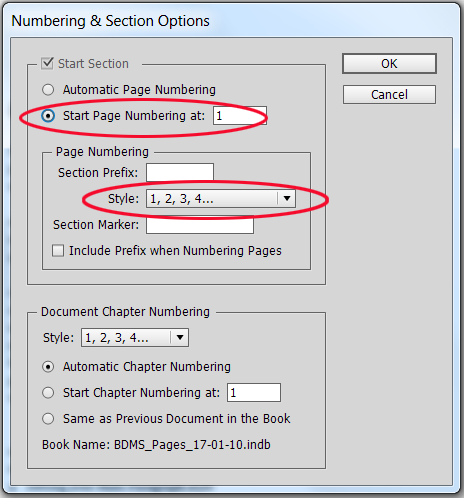
Next double-click your document for Chapter 1 in the Book file to open it. In your Chapter 1 document, you’ll manually start the page numbering at page 1, and switch from lowercase roman numerals to arabic numerals. So go to the Pages panel, click on the thumbnail image of the first page of the document to highlight it, then click Numbering & Section Options in the Pages fly-out menu. Select Start Page Numbering at, and type 1 in the adjoining box. Then select arabic numerals in the Page Numbering Style drop-down menu, as shown below. Click OK, and all the pages in the document will now be numbered with arabic numerals starting with number 1.
Finally, open each remaining document in your Book file, go to the Pages panel, click on the thumbnail image of the first page of the document to highlight it, then click Numbering & Section Options in the Pages fly-out menu. Select Automatic Page Numbering at the top, and arabic numerals in the Page Numbering Style drop-down menu, as shown below, and click OK.
When automatic page numbering has been set in all the documents except Chapter 1, the page numbers will show correctly in your Book file. If you move a document within the Book file (by dragging it up or down), you’ll see that the page numbering will adjust accordingly. Remember to save your Book file after making any changes.
Synchronizing styles using the Book feature
You’ll see in the Book file shown below that the left column contains a symbol in one of the rows called Indicates the Style Source. It means that the document in that row contains the styles that govern all the documents in the Book file if you choose to synchronize the styles. Synchronizing styles using the Book feature will synchronize your paragraph styles, character styles, object styles, and color swatches.

Suppose you’ve made some changes to the styles or swatches in your chapter 5 document, and now you want to use those updated styles or swatches throughout your book. Click in the column to the left of chapter 5 to set chapter 5 as your book’s style source. Select all the other documents that you want to synchronize to chapter 5 by pressing Ctrl/Cmd and clicking the documents (they’ll turn blue when selected).

Then click the Synchronize Styles icon at the bottom of the panel (the icon on the left), and InDesign will update all the styles and swatches. (Click here for a more detailed article about synchronizing styles using the Book feature.)
Generating an automatic table of contents
Generating an automatic table of contents is explained in Book Design Made Simple on pages 240–244, and the process is just slightly different when you’re using the Book feature. Your table of contents will be included in your front matter document, so open that document and click Layout>Table of Contents to open your Table of Contents dialog box (see our example below). Note that at the bottom left of the dialog box, the box called Include Book Documents is checked. That is the only difference when working in a Book file!
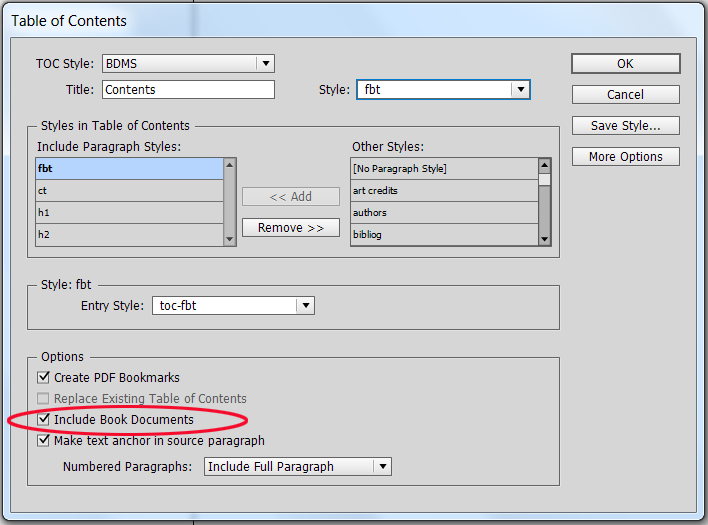
So set up your Table of Contents dialog box to gather the paragraph styles you want to include (part titles, chapter titles, and perhaps main headings), then make sure the Include Book Documents box is checked, and click OK.
Packaging the book for print
Another great thing about the Book feature is that it enables you to package all your digital files into one folder—InDesign files, linked images, fonts (if you are using any outside of TypeKit), and your Book file. Chapter 71 in Book Design Made Simple walks you step-by-step through packaging your files for print, and there is only a slight difference when you are working with a Book File: you’ll select all the documents in your Book file rather than just packaging one document.
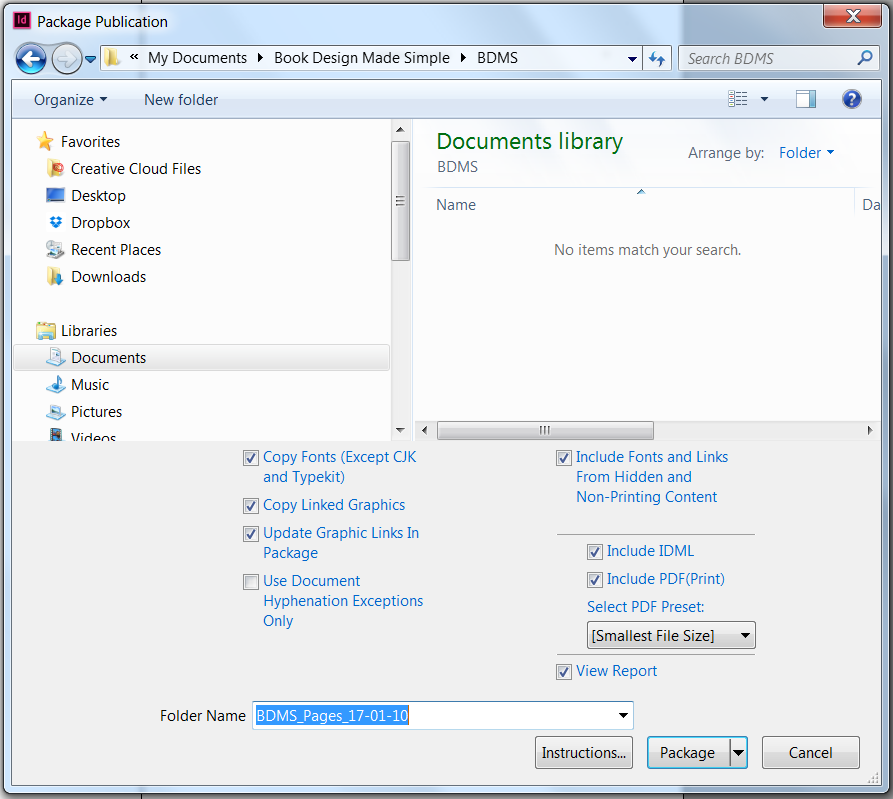
To package your book, first select all the documents in your Book file by clicking the first document, pressing Shift, and clicking the last document. Now click the fly-out menu at the top of the Book panel, and choose Package Book for Print. InDesign will take a moment to gather all the info it needs, then you’ll see a Package dialog box (click Package after resolving any warnings), a Printing Instructions dialog box (click Continue), and finally the Package Publication dialog box (see below), where you’ll choose a file name and place to save your packaged folder, and then click Package.
Once your packaged folder is saved, be sure to close the Book file you’ve been working on right away, and open the new Book file in your packaged folder. That is the Book file you’ll be using now.
Creating a single PDF of the whole book
This is where the Book feature really shines! Instead of having to create a PDF of each document within your Book file and combining them into a single PDF in Acrobat, the Book feature allows you to create a PDF of some or all of the documents in your Book file.
Select documents in your Book file by pressing Ctrl/Cmd and clicking the documents, then click the fly-out menu at the top of the Book panel. If you’ve selected all the documents in your Book file, you’ll see Export Book to PDF in the fly-out menu, and if you’ve only selected some of the documents, you’ll see Export Selected Documents to PDF instead. Click the option you see, and InDesign will present the same Export dialog box you normally get when exporting to PDF in InDesign. Choose your file name and options, click Export, and voila!
We hope this tutorial makes book production easier for you! We welcome all questions and comments, as your input is invaluable and often provides topics for future blog posts.
Read more: InDesign Book Feature: The Good, The Bad, and The Ugly »
Watch InDesign video tutorials about using InDesign »
Read more: Copyright page—everything you need to know »
Book Design Made Simple. You can do it yourself.


Great insights on using InDesign’s Book feature to manage multiple chapters and maintain consistency across large projects.
Professional design services also rely on such tools to ensure accurate formatting, smooth workflow, and high-quality book layout.
This was incredibly helpful. It walked me through exactly what I needed to do. Thank you!
You are very welcome.
Fiona and Glenna
I’m looking for a ‘global’ solution to update several different paragraph styles to just the one style as I am combining three InDesign draft books into one? Only way that I can think of is to select and update each subject header individually to the desired paragraph style.
Hi John,
When you use the Find/Change feature, you can search for styles and change them to other styles. Since the styles from the older book imported along with the text and headings, you should be able to try searching for the old heading styles and changing them to your new uniform style all at once. It will save you lots of time.
Glenna and Fiona
Hi,
I have several documents that are small booklets on their own, however, I am trying to put them all together as book, the issue is that each document has two pages at the end that have the definitions and the back cover, is there a way to skip those pages on the book without deleting them from the document files? as I would be exporting the full book and the individual booklets at the same time.
Is it possible?
Yes, it is certainly possible. If you’re going to string all your documents into one bigger one, simply do that and give the whole thing a new file name. Keep your old, smaller ones as they are. Then, it is quite easy to delete pages in the middle of the new, bigger document. In the Pages panel, select the first pair of pages you want to delete, go to the flyout menu (little horizontal lines at the upper right), and select Delete. Go through and do this for every pair of blank pages.
On the other hand, Fiona wrote two articles about using the Book feature in InDesign (https://www.bookdesignmadesimple.com/using-the-book-feature-in-indesign/ and https://www.bookdesignmadesimple.com/indesign-book-feature/). If you decide to use this method, you should delete the blank pages BEFORE you string it all together. Go through the same steps as above, but give each new smaller file a new name.
I hope this helps. We wish you the best possible result.
Glenna
Thank you Glenna, this is the way i was doing it, but i still believe that their is a proper way without deleting those pages, it is like skipping or inactive those pages on the book and keep them active on the individuals.
I appreciate you reply and thanks
Just a minute ago I posted a brand new video on how to move pages from one document to another. If you click this link, you’ll be the first to view it. I’m pretty sure it addresses your situation.
https://youtu.be/W1wQKiMeoBw
Glenna
Thank you, Fiona, for your terrific book and these posts. I’m working on a book that has about 80 separate short chapters. I understand how to synchronize the styles, but is there a way also to synchronize the headers that I have set up on one of the parent pages? To ask that question differently, what do I do if I want to change the author’s name and the title that appear at the top of most pages?
Thanks!
Hi Evan,
Glenna suggests using text variables. We don’t mention them in the book, but she wrote this article on how to use text variables for running heads: Text Variables in InDesign.
Or you could use the method we lay out in chapter 18, Using Master Pages. In that case, you’ll create a 2-page master spread for each chapter. Because you have 80 short chapters, the text variable method will probably be quicker and simpler for you.
Do let us know how you get on.
Fiona and Glenna
Hello Fiona. The book I’m making is bilngual, and first we had the Spanish start right after the English but now we want to have it start from the back and upside down. How to number thee pages seems to be the thing I can’t figure. Thank you
Hi Magdalena, what an interesting question! I love the idea of having the Spanish and English in the same book, but with each language starting from a different cover. As far as page numbering goes, I’m thinking that both languages will include a title page, copyright page, contents, and so on, and that both will start with page 1 after the front matter. So they would be two separate books, but bound together.
If the book is being printed with a traditional book printer, fit the pages of each language into its own signatures. If each language is in separate signatures, you’ll have the option of binding each language separately down the road, if you ever want to. Then, at the bindery, one language/signatures can be flipped and bound upside down, with the title page facing out.
If the book is being printed POD, you’ll need to flip the pages upside down in InDesign and have the text flow backwards from the last page into the middle of the book. First typeset all your text in continuous linked text frames, then select all the text (Ctrl/Cmd+A) and copy it (Ctrl/Cmd+C). Set up the appropriate number of blank pages at the back of the book behind the English language. On the last page, create a text frame and paste in the text (Ctrl/Cmd+V). The text will only flow onto this one page. Now flip and reverse the text by clicking Flip Horizontal and Flip Vertical in the Control Panel. Now your text frame is upside down and reversed. You’ll need to flow all the text manually, backwards, toward the center of the book by following these steps: 1) Start by clicking the outport at the top left of the text frame to load your cursor with text. 2) Click at the top left of the next page towards the middle of the book to flow the text in. 3) Click Flip Horizontal and Flip Vertical to flip and reverse the text frame. 4) Repeat until all the text is flowed in and all the pages are filled.
Magdalena, I’ve never designed a book like this, so please do let us know how it goes!
Fiona
Hi Fiona,
So I’m trying to export my book with images to epub but one particular 2-page image keeps appearing at the end of the chapter. I’ve tried anchoring the image to the the text above and below the 2-page spread but the images leaves where it ought to be and gets clustered with the anchor text. I even created a text box behind the image and anchored the image to that text so it’ll stay on that page but it still doesn’t work. I’m really confused here.
Hi Olly, I haven’t exported to epub for many years, as my area of expertise is print books. I remember that getting things to appear in the right order was definitely one of the challenges. If I recall correctly, I used to first move any 2-page-spread images onto the pasteboard, then create a linked text frame on that page. That page and the previous page would both include forced page breaks. Then I’d anchor the image to the text frame by dragging the dark little square at the top of the image frame to the left of the forced page break. No idea if this workaround still works, but give it a try! Fiona
Hi,
Thank you for this story. I’ve been using the book feature since InDesign 2.0. The latest update to InDesign CC (17.01 x64) appears to have a glitch for which you may have an answer. In previous versions, when packaging a book for print, InDesign would include ONE copy of each linked file in the Links folder. With version 17, I now have multiples of each linked file in the folder, each with a consecutively numbered suffix (Link.psd, Link_1.psd, Link_2.psd, Link_3.psd, etc.). I understand InDesign doing so when the different links with the same name are from different sources, but I have verified multiple times that all my links are from the same source. Is this a setting I am having difficulty finding? Thank you.
Hi Sylvain,
I haven’t had this issue myself, but am aware that others have. The duplication seems to arise when the same image is placed in multiple InDesign files in the same book, for example, if each chapter is saved in a separate InDesign file and all the chapters use the same image on the chapter opening page. In that case, InDesign sometimes creates multiple files, like you said.
I’m not aware of any settings that control this issue, nor of any fixes. I found a post in the Adobe Support Community from someone having the same issue in 2020, but it was never resolved.
If any of our readers have had this issue and resolved it, please could you comment?
Sorry I couldn’t be more help!
Fiona
Thank you for a great explanation of the Book feature and its limitations. My question has to do with Styles. I have 7 separate .INDD “chapter” files. Each of these files uses multiple paragraph and character styles. Some of the chapters have uniquely named styles just for that specific chapter. I’m assuming that when I compile the “book,” these unique styles will maintain their attributes.
My concern though, is that I have some styles that have the same name as in other chapters, but that actually have different attributes. For example I have different font colors for a HEADLINE style that change between the chapters. So in Chapter ONE, all HEADLINE styles are red. In Chapter TWO, all HEADLINE styles are blue, etc.
I’m wondering what will happen when I combine the files into a book. Will all those different color values in the individual chapters change to the same color (which I don’t want – I want them to be their uniquely assigned colors)?
If I change the style names to be unique so that no chapters have identical style names, will that eliminate my potential problem (i.e. “HEADLINE RED,” “HEADLINE BLUE,” etc.)?
Hopefully you understand my question – hard to explain…
I look forward to your reply!
Hi Leslie,
All the styles in all the chapters will remain exactly as they are when using the Book feature unless you specifically synchronize them to one of the chapters. I prefer NOT to synchronize the styles because, like you, I might use a style that has a different attribute (such as color) in each chapter.
So, not to worry! As long as you don’t synchronize the styles, all your styles will remain intact.
Thanks for your question and happy designing! Fiona
I found the reason why my Book Feature Page Numbers were not working. The Prefernce-General-Page Numbering was set to “Absolute Number” . When I switched to Section Number, the Book Feature Page Numbers showed correctly.
Hi Craig, you got it figured out, way to go! I’ve struggled with the page numbering too, but the Book feature really is fabulous once everything is running smoothly. Glad to hear that our book has helped too. Fiona
I recently purchased both your print book and a digital copy so that I could refer to it at home and studio. It is a lifesaver and have put it to use on two books, with more to come.
One of the books is longer with images with multiple chapters so I thought I would use the InDesign Book Feature that you reference. I set up the documents as you laid out, with 01 .indd starting at Page 1 and all the following documents set to Automatic Page Numbering.
But when viewed in the Book flyout, the numbers keep the document page numbers, ie, 1-10, 1-15, 1-12, etc. When I open each document, the first page takes its page number from the last page of the previous document, so 01 ends on page 10, 02 starts with page 11 and ends on page 20, but 03 starts with page 21, not 31 if you count from chapter 01.
I will keep working on it, but so far can not get it right.
C
Hi There,
I am putting together a book which my Grandma has written and I have used one of the inDesign book templates. Along the top of the pages, on the left page it says ‘book author’ and along the right ‘name of the book’. They look like headers, but when I go to the master page I can’t see them there and I just want to fill in this information you so you can see it on each page. Its driving me crazy!
Hope you can help.
Thank you, Louise
Hi Louise, I’ve never used an InDesign book template so am not sure what they include, but it sounds like the running heads are on a master page, especially if the same running heads appear on all the pages. You can override a master page item manually by pressing Ctrl/Cmd+Shift and clicking on the item. If it “unlocks” it, then you’ll know for sure that it’s a master page item. (Remember to undo or Ctrl/Cmd+Z to put that item back on the master page!)
If it’s a master page item, you’ll need to figure out which master page the running heads are on. In your Page panel, the master pages are at the top, above all your regular pages. You can’t always see all the master pages, so you may need to use the scroll bar to the right to scroll down. Open each master page by double-clicking the icons to find which one contains the running heads. Then you’ll be able to select the text and replace it with your running heads.
Good luck, and I hope this helps!
Fiona
Hello,
really helpful article, thank you. I have a question for better than me. I have a book in InDesign, 8 chapters. Each chapter ends on the left. The chapter is an InDesign file. When I export a Book to a pdf file and mark the spreadsheet in the options, the pdf file is actually the spreadsheet. But the last and first pages of the chapters do not merge and do not create spreads.
In the pdf file you can see it as two individual pages – the last from the chapter before and the first from the chapter after.
And I need these two pages as spreads.
How do you do this to power the book with InDesign as it will then be printed?
English is not my first language, so sorry for the language mistakes.
Greetings to all readers.
Hi Radek, That’s a great question. Unfortunately, it’s not possible to create spreads using the Book feature if you have chapters starting on a right-hand page and ending on a left-hand page. InDesign will not put those two pages into a spread.
Perhaps I can suggest a workaround. Most printers will insist on using a PDF that has single pages only, NOT spreads. So the spreads feature is not needed for printing. But perhaps you’d like to see your book displayed as spreads in the PDF? It’s much easier to view book pages in 2-page spreads, and there’s an easy way to do that:
Export all the pages in the Book file without checking the Spreads box (i.e., just create a normal PDF). Then, with your PDF open in Acrobat, select View > Page Display > Two-Up. Then select View > Page Display > Show Gaps Between Pages. Then select View > Page Display > Show Cover Page During Two-Up. (It’s too bad these can’t all be selected at the same time, but you do have to select them all separately.) Now all the pages in the book will display in 2-page spreads except for the first and last pages.
One last thing: To make the PDF always open in 2-page spreads, click Ctrl/Cmd+D to open the Document Properties dialog box. Select the Initial View tab, then in the Page Layout drop-down menu, choose Two-Up (Cover Page). In the Magnification drop-down menu, choose Fit Page. Check the Center Window on Screen box, then click OK. Be sure to save the PDF (Ctrl/Cmd+S). Now your PDF will always open in 2-page spreads, plus any printer can use this file for printing your book.
I hope this helps! Fiona
Actually, it is possible to have one chapter ending on the left and the next chapter starting on the right. You have to go to the pages window for each chapter, select the little pictures of the pages of the chapter, and then select whatever combination of the options (in the menu you get from the three parallel lines icon at the top right) of the two options: ‘Allow document pages to shuffle” and/or “Allow selected spread to shuffle”. Then you drag the page to the left or right. Take care! This is a good way to waste a lot of time if you make mistakes!
Hello,
Thanks so much. The article has been helpful. I was wondering if you have suggestions for creating an index for a book with separate chapters in indesign. I’m not so familiar indesign. I’m working a sociology textbook and rather using Ms Word or Corel Draw to layout the book, I’ve decided to try indesign and I think I’m enjoying the experience.
Hi Adigam, If you are creating each chapter in a separate InDesign document and compiling them using InDesign’s Book feature, you’ll find that an automatic InDesign index will only generate index entries at the end of each document, with no way to compile them into one index in the book’s back matter. I hope this answers your question! Fiona
Wow, Book Function has no index? Are you serious? I’m asking in Nov. 2020, only a few months later. Every serious non-fiction book must have a full index at the end. Why even use the Book Function, if the index doesn’t appear at the end of the whole book? Maybe this has changed. And, having read further down, with Book we risk losing all hyperlinks? I must have the index at the end and the hyperlinks in the ebooks. If these two situations are indeed still what is happening, might I suggest that these glaring deficiencies be mentioned in the very, very beginning of this article? Or immediately refer to your other article on the Good, the Bad, etc. After reading the current article, I felt confident enough to go ahead with the Book option and do a lot of work, and well might have waited until the end to finish the index, before I notices that index isn’t offered. I’ll look further, but if I must have to the whole book in one document to have a proper index item, then Book Function (.indb) isn’t viable. I just jumped to the InDesign User Guide instructions
(https://helpx.adobe.com/indesign/user-guide.html/indesign/using/creating-book-files.ug.html) and under Book Function, the index is not even mentioned. Adobe should warn users in the User Guide that index doesn’t work in in the Book Function. Good grief, why even call it “Book” if it doesn’t allow an index? Call it a “Composite File” or something other than Book. That’s like calling a recipe “omelette” but not telling us first of all that eggs can’t be used. Further, what about endnotes, another requirement at the end of just about every non-fiction book that will be published? I’ll look that up too.
Still, what about the main advantage of this composite Book Function, which is that if one part of the 200 to 600 pages becomes corrupted, that it doesn’t ruin the whole document, when working in the Book Function? That seems great. Can we take the book composite (.indb) and convert in into one InDesign file (.indd) then add the TOC, index and endnotes? It does feel risky when you get to hundreds of pages, worrying that if something is corrupted it ruins the whole document, or significant portions of it. Is this as much of a risk in InDesign as it is in Word? I won’t use Word or Word for Mac for anything that will touch my books anymore, not even to cut and paste one quotation out of. I will retype the sentences or paragraphs, rather than risk using Word or Word for Mac mixed into Apple Pages or InDesign. If I am starting in InDesign to type my text, or I place it from Apple Pages, is InDesign fairly stable to support a 500 page document, without corruption?
Hi Troy, Thanks for your comments. I agree it’s disappointing that live indexes and endnotes-at-the-back-of-the-book don’t work with the Book feature. I use the Book feature a lot, but only for books where the index is provided by an indexer as a separate Word doc. And if the endnotes are live, they can be placed at the end of each chapter or part instead of at the back of the book (which is standard with a lot of publishers anyway). The live index and endnotes in InDesign are relatively new and that’s why they aren’t supported by the Book feature.
There is no risk of losing your hyperlinks as long as you don’t change the file names of the Book file and all the documents within. Glenna and I discovered that the hard way, but now that you’re aware of this issue you won’t have the same problem as we did.
I don’t know of a way to save an .indb file as an .indd file as you described. It’s worth noting that I’ve never had an ID file go corrupt, and I’ve been working in ID since it was first released. I have had ID files get horribly messed up and impossible to work on as a result of importing corrupted Word and Pages docs, however it becomes apparent almost immediately that there are problems with the text. So if you’re well underway with a large ID doc and experiencing no problems, you’re probably fine!
Despite the index and endnote issues, I still love the Book feature and use it for large books whenever possible. But since you have a live index and endnotes, I suggest you forego using the Book feature for your book. Since you’re avoiding importing anything from Word or Pages, there’s almost no chance of your ID document becoming corrupted. If your whole book is in one document, you can use all the live features including hyperlinks without any issues.
I hope this helps! Fiona
Thank you. It’s great to hear that InDesign is crash free and bug free. InCopy would then logical for text writing. I didn’t know that Pages might have some conversion problems. I have two texts to convert from Pages. But after that, why risk anything on Pages or Word, for new writing? I’ll use InCopy for new writing. I’ve already given feedback to Adobe to request an index/endnotes for the Book file. If we all do that, hopefully Adobe will realize that it will help customers, thus their sales.
I all, very well organized instructions and “how-to’s”. I own a graphic design and printing company and have been in the business for over 65 years. I can relate with most of what you have written so that’s fine. I am in the process of writing a book about our Yorkie, Millie and how she made our life a joy. I have about 30 chapters written at this point. I am quite familiar with Adobe Indesign and have design many promotional pieces, so I look forward to working on my own project for a change.
I ordered your book from Amazon couple days ago. In reviewing your promotional materials it appears you are discussing InDesign 2019. I have v15.o.2 running on HiSierra. Will your instructions work for that version? I’m starting off small so I just registered my web site with GoDaddy and will add a lot of the goodies you recommend when I get close to completing the project. Now is a great time as you can imagine due to the nationwide quarantine! Thanks again for producing a very comprehensive outline of book design and publishing!
Hello Louis,
We wrote the second edition of the book using ID 2017, and any relevant updates since then are covered in our blog. We have found over our years of using many versions of InDesign that the basics do not change at all, especially as related to book design and production. The main thing that does change is the way Adobe arranges items in the dialog boxes and panels, so that everything is still there, but perhaps in a slightly different position in the same panel. We are confident that every single thing you will need to design your book about Millie will be covered in Book Design Made Simple.
If you do run into any problems, just let us know and we’ll try to help.
Best of luck with your book. It sounds like a labor of love.
Glenna (coauthor)
Hello, can you tell me the best way to copy, duplicate and/or move a book and not have to deal with the text anchors not working please? I have a book which I have copied to another folder, unfortunately all my text anchors continue to point to the original folder. I have tried relinking and it still does not work. what is the best way to copy a book or get it to relink itself in a new folder. thank you for your time.
Hi Kayvon, I’m so sorry to tell you this, but you can’t move or rename book files and still have all the text anchors, hyperlinks, and images remain linked properly. You can relink the images automatically, but I don’t know of any way to automatically relink text anchors or hyperlinks. Glenna and I had the same thing happen to us when we created the Second Edition of Book Design Made Simple. We duplicated our folder and files and renamed them to include “2nd-ed” and realized too late that none of the hyperlinks worked. We changed the file names back but the hyperlinks still didn’t work. So we had to relink thousands of hyperlinks manually (the whole index, all tables of contents, and all “see page xx”). I wrote a blog post about this Book feature problem called InDesign Book Feature: The Good, The Bad, and The Ugly. This issue is included in the UGLY section! If any other readers know of a way to avoid relinking manually, please share with us! Fiona
I used to accomplish this by packaging the book. The new packaged book could be moved anywhere, renamed, etc.
John, that’s a good point! When packaging the files using the Book feature, you can choose a new name for your Book file (the .indb file) and for the new folder that the package goes into. However, the individual document file names stay the same. If you try to change those, you can lose hyperlinks.
As long as the names of the images are not changed, you can relink to a different folder if you moved the images to a different folder. You can relink a whole set of images all at once. In the links window, you select the names of the image files you need to relink, rightclick (or go to the three parallel lines options in the top right corner) and you should find an option to relink to a file location, which you then choose, without having to choose each image separately. Alternatively, once you relink one image, the program may automatically relink the other images to the same folder.
Thank you very much for this article, it’s been very helpful!
I’m helping my father out with a book about plants species in our area and I would like to have your opinion on this matter.
The book includes more than 800 species (4-5 pages each, including a page with 5-6 pictures). I’ve been doing some tests and the PDF file for each species would be 2 mb o more, so the entire book (including some sections other than plant species) would be around 2000 mb.
He plans to release the book in a DVD, pen drive or via a link for digital download (free of charge in any case). Do you think it would be feasible to create a 2000 mb PDF file or this would be too big for some PCs to open it?
Do you have any other suggestions on how to do it?
Thanks in advance!
Hello Dani,
I’m glad you found the article helpful. But if my suggestions to shrink the file size don’t work for you, and your file size is still enormous, you might not want to use the Book feature.
I have three suggestions that might shrink your file size. If you haven’t already tried these, they will definitely help you.
2. Group your photos in Photoshop before placing them in InDesign whenever it’s practical, such as when you’re planning to arrange them all on one page anyway. This will reduce the number of photos from 5 or 6 on that page to 1. You can arrange the pictures in InDesign just the way you want them, then make a PDF of that page. Open the PDF in Photoshop and put it on a lower layer, then use it as your guide as you redo the grouping. Delete the PDF layer, then save. If there will be captions, simply place the one big photo on the page and then put the captions in the white space(s) in InDesign. (That way you can change the captions later if necessary without going back into Photoshop.)
3. If you have the full Adobe Acrobat program (not just the Reader), you can save any PDF at a smaller size.
If your PDF is still going to be 2000 MB in the end, my best advice would be to divide it into sections for distribution. Sending and receiving such a massive file would be too time-consuming for most people, no matter what kind of computer they’re using.
I hope this helps. Best of luck with your big plant book!
Glenna Collett, coauthor
Thank you Glenna and Fiona for such wonderful tutorials and posts.
I am using the Book Feature on a 2020 copy of InDesign. I discovered that the Book panel indicates the page numbers unique to each document in the Book, but the numbers are not consecutive. I’m using it with a Mac and running under Mojave. I followed your tutorial on setting up page numbers but the documents are not responding according to procedure. Has anyone else had page numbering problems in InDesign 2020?
Hi Edward, thanks for your kind words! I’m wondering whether all the documents in your Book are showing the wrong page numbers, or just one or two? If just one, I suggest moving it to a different position in the Book file, and then returning it to its proper position. Sometimes that sorts out the numbering. Also, if it’s just one or two documents that aren’t numbered properly, check that those individual documents have the Automatic Page Numbering option selected.
There are a number of InDesign 2020 bugs that were fixed in the recent update, so double-check that you have that update.
And if any of our other readers have experienced a similar issue with the Book feature, please comment and let us know!
Hi Fiona, I checked and I am using the latest version if InDesign 2020 (V 15.0.1)
I tried repositioning and returning a few of the documents in the book but there was no change in the numbering.
The Book file displays the number of pages for each document individually. i.e. i-vi, 1-30, 1-16, 1-36, etc. but they are not consecutive. i.e. i-vi, 7-37, 38-54, 55-91, etc.
Front Matter is numbered correctly. Chapter 1 is numbered correctly. So is Chapter 2. But Chapter 3 (set automatically, like Chapter 2) starts numbering at 17 rather than the 47 it should be.
I think I will use manual numbering.
Best regards
Hi Edward, how frustrating! I can’t think of a reason why your numbering isn’t automatic, and why it stops working at Chapter 3. In this case, manual numbering is probably your best workaround. Fiona
Great article Fiona and Glenna! I’ve been working on a difficult project and the book feature has been a life saver!
Linda, we’re so glad the article helped. The book feature is pretty awesome!
I’ve tried creating a book from Indesign files but some of the files ‘cannot be added as they are locked and cannot be added to book file!’
Any idea how to unlock?
Hello Jo,
I have never encountered a locked InDesign file before, so I had to look this one up. If the file extension is “idlk” it simply means that the file is in use at the moment. Are you working with a network of people? Someone else might have the file open.
At any rate, here are links to some help articles that might solve your problem. I notice that they are all rather old, though. Let us know if these don’t address your problem.
https://indesignsecrets.com/can-i-open-an-indesign-lock-idlk-file.php
http://www.justskins.com/forums/indesign-locked-files-help-239298.html
https://filext.com/file-extension/IDLK
Glenna
Hi,
Is it possible to share books with other teammates in the office and be able to work on different pieces of the book at once?
We often work on large submittals together and have to make copies of each other’s ID files in order to work on them at the same time, then try to figure out which pages are updated and drop those pages into our files.
It seems this tool could be useful so that we can each own a section and it auto populates in one large book. Can you explain how this would work, if at all possible?
Hi Krystal, good question. Glenna and I wrote Book Design Made Simple by working on different sections of the book at the same time, and it worked really well. But we couldn’t work on the same section at the same time. That is apparently possible if you use InCopy but we never tried it. When we finished working on a section, we’d save it with today’s date at the end of the file name, and that way we’d always know which was the latest version. We couldn’t compile all the sections into a book file until the very end, because the file names can’t be changed once the book file is made and that meant we’d no longer be able to keep track of the latest versions.
So, yes, it’s possible for your team to work on different sections of a book at the same time, but you’ll need to copy the latest file and save it in a way that the team knows which is the latest version. And two of you can’t work on the same file at the same time. I hope this helps!
Really love this site, so helpful for those of us working ‘out here on our own’.
My question is whether it’s best to create and package (fonts and images etc) all your individual chapters and keep them separate until nearer the end of the process when they can be brought together in Book and the order of contents finalised.
Any thoughts on this? Whichever I can see the absolute logic of consistent and clear file names and dates.
Hello Barbara,
I hope you will first read our other, cautionary, article about the Book feature. That might answer your question right away.
If you are still okay with using the Book feature after reading about some of its limitations, then I’d say the answer to your question depends quite a bit on the length and complexity of your book. If it is a novel, for instance, keep it all as one file. If you have lots of illustrations and lots of chapters, feel free to use the Book feature.
Personally, I never, ever used the Book feature until I teamed up with Fiona on Book Design Made Simple, and I did just fine with all sorts of long, complicated books. On the other hand, Fiona used it all the time in her work.
I hope that answers your question. Basically, it’s up to you! Let us know if you run into any snags along the way, and good luck with your book!
Glenna
Thanks so much Glenna. I have a number of chapters, each with colour images, and will be working in the first instance to manage the size of images I am dropping in so each one is not too unwieldy.
The key thing re using the Book function is being able to alter the order of chapters at the end, with the contributors making such decisions right near the end!!!!! Like the idea that page numbers will automatically self correct if I move chapters around in the ‘Book’.
This has been a life-saver! Thank you!
Glad you found it helpful, Sally!
Hello thanks for the tutorial. I’d like to know, how do you print a booklet from the book feature?
Hi John, I don’t know of any way to print a booklet from the book feature. As you’ve probably discovered, the Print Booklet dialog box can only be accessed from the File menu and is not available in the regular Print dialog box. I don’t know of any workaround either. Printers, print shops, and copy stores can print booklets, and they use special software to do that from PDFs.
I have heard that it takes time to generate a package. Is it true? What is the normal time required to generate a package? Is there any dependency for generating the package. Can you help with this?
Hi Rohan, it can take some time to generate a package. It depends on (1) how many documents and images are in your Book package, (2) how large the file sizes are, and (3) how fast your computer is. You’ll see a status bar showing progress, so that’ll help you judge how long it will take.
Does that answer your question? If not, please feel free to ask further questions.
Do you know if there is a limit to the number of files that can be added to a book. Or if there is a limit to the total number of pages in a book?
Thanks.
Hello Betsy, I have never heard of any kind of limit on the number of pages in a book. However, once a book gets too big it’s harder to find a good binding to hold it together, and it’s harder to pick the book up. If you’re thinking of anything longer than maybe 3000 pages, you should talk with a printer about proper binding, good thin paper, etc. to make it usable. And consider dividing it all into separate volumes.
Also, if you have huge numbers of files (images, I’m assuming), your InDesign file will get bigger and bigger, of course. In that case, you’ll want to divide the project into separate sections and use the Book feature to combine them at the end.
The point is to keep your InDesign file and your book from becoming unwieldy. Just think what would happen if your gigantic InDesign file somehow got lost or corrupted. It would be easier to deal with if that happened to only one section, right?
I hope this answers your question, Betsy. Good luck with your big project!
Thanks, you guys, for another really helpful post! I’m sure I’ll be referring often to this one!
L
Lyle, InDesign’s Book feature will be perfect for your upcoming history book. You’ll be able to work on the chapters independently and then combine them into a book at the end. It’s a great feature!